Showing posts with label tools. Show all posts

Thursday, November 29, 2018

He who dies with the most toys....


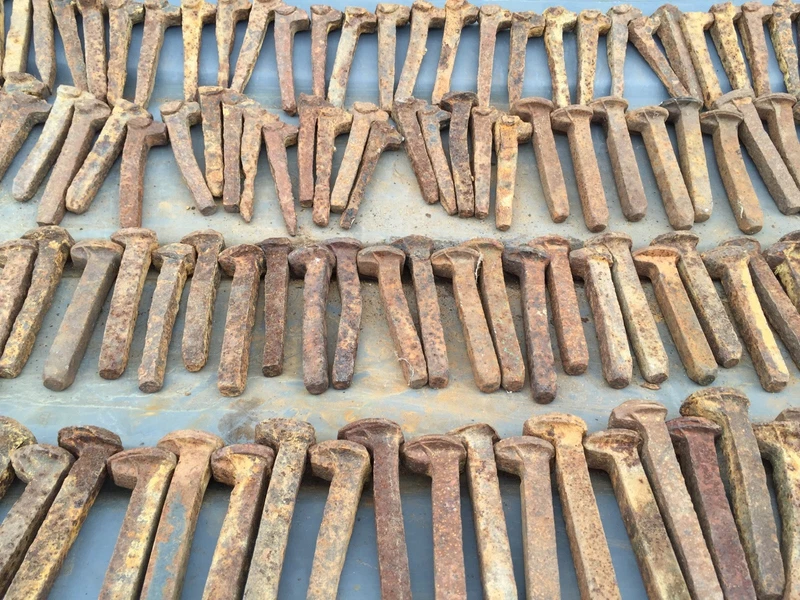
Railway sleepers n dog spikes
Railway dogs
For some people it's coins, for others it's frequent flyer points or compliments. I even know a retired minister who collects railway dogs. But for me, it's always been tools. 

In contrast to my Dad, who considered that every tool he owned was a hammer, I'm on a quest to find the right hammer for the job.

So it was with much fanfare that I recently welcomed three new tools to the fold.

Air powered riveter
There are approximately 2,000 rivets in the ceiling of our house – all installed by me, by hand with a lowly Bunnings hand rivet gun. By the end of each day it was a two handed job to pop rivet. Imagine my surprise when a friend mentioned to me recently that he had an air powered rivet gun. I hadn't known such things existed!  Suffice to say that within days of that conversation I bought one.

Conclusion: I wish I'd had one 2,000 rivets ago.

A box and pan brake
So, I was in the market for some weatherproof covers for my water pumps. At around $160 each I wondered if there was a DIY option that didn't look like a recycled compost bin. And yes there is, if you have a box and pan brake.

There's a 3 minute demo of one here: https://www.youtube.com/watch?v=d4RWkf7eo1g&t=9s

Conclusion: It's brilliant (and no, you can't borrow it).

Clekos
"A cleco, also spelled generically cleko, is a temporary fastener developed by the Cleveland Pneumatic Tool Company. Widely used in the manufacture and repair of aluminum-skinned aircraft, it is used to temporarily fasten sheets of material together, or to hold parts such as stiffeners, frames etc together, before they are permanently joined. Clecos are installed in holes predrilled through the workpieces (usually holes intended for permanent fasteners installed later). They expand on the far side of the workpieces and then draw and clamp them together while maintaining the desired alignment and preventing distortion of the pieces."

There's a 1 minute demo here if you're keen: https://www.youtube.com/watch?v=hYpEfo_OSKI

Conclusion: You can never have too many clekos.


Wednesday, December 6, 2017

It was bound to happen eventually

While building Pemberley I have observed that the probability of incurring an injury increases exponentially as the day progresses. It's that last hour or so around 5:00pm that I seem to push myself to lift just a few more kilos, stretch a extra couple of centimetres or finish those last few rows.

To date I have been fortunate to stave off serious injury - though drilling through my thumb and arguing with the tractor hydraulics were clear near misses. I'd like to be able to say that this great record is due to my wise and considered work practises. But that would be fibbing a little (check out my scaffold). While I try to be mindful of what I'm doing and how I'm tackling it, ultimately I have avoided hospital visits mainly as the result of having a wife who is a nurse (instant, on-site medical attention) and who keeps a wary eye on how tired I'm getting.

But the system let us down yesterday. Around 10:30am I was moving my bandsaw (it wasn't running) in the workshop and it got stuck on the edge of the fatigue mat. So I lifted the castored corner about a centimetre, slid it over the mat and popped it back down. The problem was I dropped it on my finger. Nette's medical advice astounded me – it's the first time that she has said we should go to the hospital.

Seen last night in ED. The sign reads
"Please keep clear! This space is for
the emergency cart only."

We got home around 10:00pm after X-rays, orthopaedics and attempting to realign the bone in my little finger.  (She was right.)

Moral to the story – whilst you can minimise the risk of injury by knocking off before 5:00pm, you can never totally eliminate it.

Some facts
Injuries due to contact with tools and machinery most often result in an open wound (31%) or a fracture (23%)Australian Institute of Health and Welfare, Apr 19, 2017.

Saturday, August 16, 2014

The swinging (18) 60s

 
The French doors I’ve collected aren’t really from the 1860’s, more like early 1900’s, but they would have been much the same. (Besides, “the swinging early 1900’s” just doesn’t have the same ring to it.)
 
The left and right pairs of doors are made from Australian cedar. We found them at the Grenfell tip, complete with 8 coats of paint, broken glass and rotten joints. The middle pair was discovered in Wombat, NSW, they are pine with cedar panels – kind of the negative of the Grenfell doors which are cedar with pine infill. The door frames are new, dressed all round (DAR) Australian Ash. All the timber is still raw, I will probably oil it with the same finish we used on the floor, but not until I’ve completed the glass.
 
Hanging doors isn’t one of my favourite jobs, especially when every door is a slightly difference size, out of square and with a bit of a warp. But hang them I did by following these steps:
 
1.  Cut door to correct height.
  • The door openings were made to accommodate the width of specific pairs of doors, the height was based on the shortest door less 10mm. This let me make the top and bottoms of the doors square.  
2.  Mortise hinge locations on doors.  
  •  Given every door is a slightly different width I did this by hand with a chisel.
3.  Attach hinges to door with 2 small screws.
  • There are four holes in each hinge. Using only two screws gave me the ability to change a hinge’s position if I needed to.
4.  Stand door in place with ply under it to set the bottom clearance.
  
5.  Mark hinge locations on door frame with a knife.
  
6.  Cut hinge mortises on door frames.
  • I could have used a router and template as the hinges and frames are uniform – but I did it by hand.
7.  Stand door in place and put 1 small screw in the top hinge and 2 in the bottom one.
  
8.  Remove ply.
  
9.  Test the fit and trim top if required.
  
10. Put “proper” screws in remaining holes. These are a bigger gauge and longer.
  
11. Replace all “small screws” with “proper” ones.
  
12. Have a coffee.

Getting a pilot hole in the right place for a hinge can be tricky at times. The drill bit sometimes moves and then the hinge ends up a few millimetres (or worse) out of place.  There’s two good ways to limit the chance of this happening. The cheap way is to press an awl into the timber where you want the drill bit to start.  Kind of a pilot hole for the pilot hole.  The better way is to buy a funky drill bit that has a spring loaded tip – enabling you to locate the drill bit exactly in the centre of the hole everytime.  Check them out here at Screwit Screws.

Monday, May 21, 2012

Beating the enemy - dust

The Rolls Royce of sanders
I had long concluded that when it came to sanding there was always going to be dust on the hanky when I blew my nose at the end of the day - even with the brilliant Dust-Be-Gone dust mask.

But all that changed on the weekend when I sanded the hardwood flooring in one of the upstairs' bedrooms with my Festool RS100CQ sander connected to the Festool CT26E dust extractor (which is a euphemism for "vacuum cleaner").

After a day of sanding, the hanky was clean - not a speck.  Now that's impressive.

You may ask: why sand an entire floor with a 1/3 sheet sander?  Well, two reasons:
  1. We don't want every imperfection eradicated, if that were the case we'd use laminate flooring over a chipboard floor. No, we want a floor that has some character but no splinters.
  2. For the cost of hiring a floor sander I purchased the the RS100CQ second hand. And as sanders go - it is the Rolls Royce.

Thursday, February 23, 2012

Benched....again

Oiling the benchtop
After a lot of fiddling and fine tuning I can finally announce that we are the proud parents of my first kitchen bench.  Joining the 3 benchtop components went better than expected as did levelling them - which I did using Dad's ancient Ryobi electric planer (it was actually made in Japan!).  But the most rewarding moment came while oiling the top.  It's probably the first time since the timber was milled over 100 years ago that the natural grain is again the star.

Next job - building a shed.

Sunday, September 25, 2011

Right tool for the job

The more I do on the house or in the workshop the more I realise that having the right tool for the job is absolutely essential.  Hence, everytime I go to the croft I take umpteen tool boxes with pretty well every tool I own.

But last weekend, when I had to take Nette's little corolla instead of my beaut ute, I was forced to downsize the tool department - considerably.  To be honest it wasn't that hard because there were only two jobs on the "to do" list: finishing the floor using the nail gun and compressor that were already onsite; and cleaning up in preparation for the tiling.

I dutifully did the Santa thing and made a list and checked it twice, but despite my best efforts I found myself caught without a very vital piece of equipment that no carpenter should ever be without...tweezers.

So, when I got an enourmous splinter I had to resort to a rusty safety pin I found in the bottom of one of my tool boxes and a pair of pointy nose pliers.  I'm not sure which hurt the most, the splinter going in or me getting it out.

Sunday, August 14, 2011

Staple diet

To secret nail a floor you need a nail gun specifically designed for that type of work.  In fact, it’s not a nail gun at all, but an air powered stapler (that must be why they call it a nail gun?) that fires a 45mm staple into hardwood at a 45 degree angle.  You hook the device up to a compressor and whack a white button on the top of the tool with a rubber mallet – pulling the boards together and firing off the staple at 100psi.  In fact, these tools are so good there's little need to clamp the boards, the sheer impact of the staple closes most gaps.


Floor nailer in action

So, the big question – whether to buy, hire or borrow a nail gun that does one thing and one thing only.  In case you’re wondering, no, they will not fire any other type of nail at any other angle – they just “do” staples at 45 degrees.
 
It would seem that the tool of choice is a Paslode – at around $600 – a big hit for one floor.  Option two was to hire, at around $290 for a week – but what if I didn’t get it done in one week?  Further, I’d have to hire it in Canberra as the local hire shop doesn’t have any on their books.

The third option was to buy a cheap one, which appear on EBay and the like for under $200.  I emailed a couple of EBay vendors asking about warranty and the like but had no reply.  So that cruelled that option for me.

Then I came across a forth alternative – buy a fully reconditioned unit from MS Tools for under $300.  With a 12 month, trade use warranty, Sydney support and friendly, responsive service I figured I had little to loose and went ahead.

So, how did it perform….well I’m glad you asked.  I fired around 2,000 45mm staples into hardwood flooring over 6 days.  During that time there were two hiccoughs.  The first was when I missed the tool with the mallet and hit my shin, dropped the hammer and nearly fell through the floor (2 weeks later I still have the bruise).  The second was when the nailer fired two staples instead of one.  This was easily rectified by tightening a couple of bolts around the frog – no drama, just routine maintenance.

So, with 20 square metres to go I’m glad I purchased the MS Tools nail gun.  I’m not sure what I’ll do with it when I’m finished – perhaps sell it and recoup some of the money (let me know if you’re interested J)